Looking for a safe, comfortable space for your dog to enjoy the outdoors? Building your own outdoor dog kennel might be the perfect solution.
Imagine giving your furry friend a cozy spot to play, rest, and feel secure—all made by you. In this guide, you’ll discover simple steps to create a kennel that fits your dog’s needs and your budget. Ready to take control and provide the best for your pet?
Keep reading to find out how easy and rewarding this project can be.
Choosing The Right Location
Choosing the right location for your DIY outdoor dog kennel sets the foundation for your dog's comfort and safety. The spot you pick affects everything from temperature control to ease of access. It’s more than just finding an empty corner—it’s about creating a space your dog will love and thrive in.
Consider Sun And Shade
Think about how sunlight moves across your yard during the day. Dogs need shade to cool down, especially in hot weather. A kennel placed in full sun can quickly become uncomfortable or even dangerous.
Look for a spot that gets morning sun but offers afternoon shade. If natural shade is limited, plan to add a canopy or plant fast-growing trees nearby. Have you noticed how your dog behaves in different parts of your yard at various times? That’s a good hint for where to build.
Check Ground Level And Drainage
The ground under your kennel should be level to keep the structure stable. Uneven surfaces can cause wobbling and might stress your dog’s joints. Also, consider how water drains in that area after rain.
A spot that collects water or stays muddy will make your dog’s space unpleasant and unhealthy. Test the ground by watering it and watching where water pools or runs off. If necessary, you can add gravel or sand to improve drainage.
Assess Safety And Accessibility
Safety should be your top priority. Avoid locations near busy roads, toxic plants, or places where predators can easily hide. Also, check for hazards like sharp objects or unstable fences.
Accessibility matters too. You want to be able to clean the kennel, refill water, and interact with your dog without hassle. Ask yourself: Can I easily reach this spot every day? If not, it’s worth reconsidering.

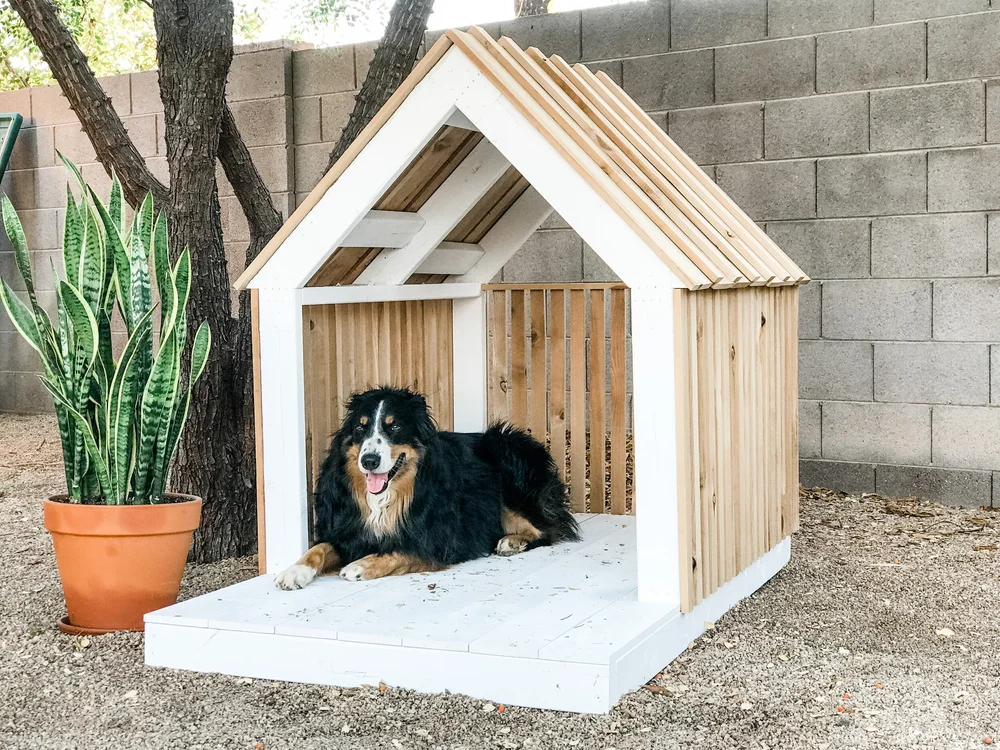
Credit: www.amazon.com
Selecting Materials
Choose sturdy, weather-resistant materials like treated wood or metal for a safe outdoor kennel. Ensure materials are pet-friendly and easy to clean for long-lasting use.
Selecting the right materials is crucial for building a DIY outdoor dog kennel. The materials you choose affect durability and safety. They also impact the kennel’s appearance and maintenance needs. Consider the climate and your dog’s habits. This ensures comfort and longevity. Let’s explore material options for your project.Types Of Wood And Metal
Wood and metal are popular choices for kennel frames. Wood offers a natural look. It’s easy to work with and affordable. Choose rot-resistant types like cedar or redwood. They withstand weather better. Metal provides strength and durability. Galvanized steel and aluminum are common. They resist rust and require little upkeep.Fencing Options
Fencing keeps your dog safe and secure. Chain-link fencing is a strong option. It’s durable and provides clear visibility. Welded wire offers added security. It’s harder for dogs to bend or break. For a more aesthetic look, consider wooden picket fences. Ensure they are tall enough to prevent jumping.Roofing Materials
A roof protects from sun and rain. Metal roofing is durable and weather-resistant. It’s also low-maintenance. Asphalt shingles are another option. They are cost-effective and available in many colors. Polycarbonate panels offer transparency. They let in natural light while blocking harmful UV rays. Choose materials based on your local climate and aesthetics.Planning The Design
Planning the design of an outdoor dog kennel sets the foundation for a safe and happy space. Thoughtful planning helps meet your dog’s needs and fits your outdoor area. Focus on size, ventilation, and comfort to create a kennel your dog will enjoy.
Determining Size And Shape
Choose a kennel size based on your dog's breed and activity level. The space must allow the dog to stand, turn, and lie down comfortably. Consider the shape to fit your yard and shelter needs. A rectangular or square shape often works best for space efficiency.
Incorporating Ventilation
Good airflow keeps the kennel fresh and prevents heat buildup. Include windows or mesh panels for natural air circulation. Position openings to block strong winds but allow gentle breezes. Avoid fully enclosed areas that trap heat and moisture.
Adding Comfort Features
Comfort increases your dog’s happiness and health. Add a raised floor to keep the dog off cold or wet ground. Use weatherproof bedding for warmth and softness. Provide shaded areas to protect from sun and rain. Include a small door flap to keep out drafts while allowing easy access.
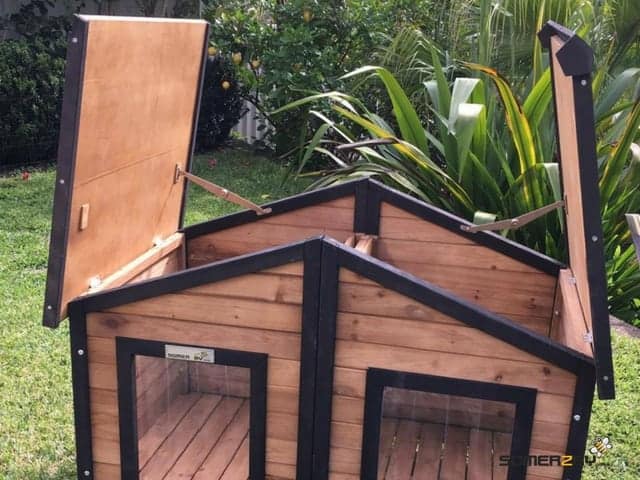
Credit: www.humboldt.ca
Gathering Tools And Supplies
Before you start building your outdoor dog kennel, gathering the right tools and supplies is crucial. Having everything on hand not only saves time but also helps you avoid interruptions during the project. Let’s look at what you really need to get started.
Basic Tools Needed
Your toolbox should include some essential items that make construction easier and more precise. A reliable measuring tape will help you keep dimensions accurate, while a handsaw or power saw lets you cut wood or panels to size quickly.
You’ll also want a drill with a set of bits for creating holes and driving screws. Don’t forget a hammer for nails and a level to make sure your kennel stands perfectly straight. These basic tools form the backbone of your build process.
Safety Gear
Safety isn’t optional when working with tools and materials. Protect your eyes with safety goggles to prevent dust and debris from causing harm. Gloves are essential to avoid splinters and cuts, especially when handling wood or metal.
Consider ear protection if you use loud power tools, and a dust mask if you’re cutting materials that create fine particles. Taking these precautions ensures you stay safe and comfortable throughout your project.
Hardware And Fasteners
Choosing the right hardware and fasteners affects your kennel’s durability and stability. Galvanized screws and nails resist rust, which is important for outdoor structures exposed to weather. Hinges and latches should be sturdy enough to keep your dog secure but easy for you to open.
Think about including corner brackets or metal plates to reinforce joints where walls meet. These small additions can make a big difference in the kennel’s lifespan and strength. Are you ready to pick the best parts that fit your design and your dog’s needs?
Building The Frame
Building the frame is the foundation of a sturdy outdoor dog kennel. It shapes the entire structure and ensures safety. Focus on accuracy and strength during this stage. Quality materials and proper techniques lead to long-lasting results.
Measuring And Cutting
Start by measuring the space for the kennel frame. Use a tape measure and mark all wood pieces clearly. Measure twice, cut once to avoid mistakes. Use a saw to cut wood to the right size. Smooth any rough edges with sandpaper.
Assembling The Base
Lay out the base pieces on a flat surface. Connect the wood using screws or nails for a strong hold. Check the base for square corners using a carpenter’s square. Reinforce corners with brackets for extra support. The base must be stable and level.
Constructing The Walls
Build each wall frame separately before attaching to the base. Use vertical and horizontal supports for strength. Secure the corners tightly with screws. Ensure walls are straight and even. Attach walls to the base firmly to prevent wobbling.
Installing Fencing And Gates
Installing fencing and gates is a crucial part of building your outdoor dog kennel. The right setup keeps your dog safe and comfortable while allowing you to maintain control over their space. Let’s break down how to attach panels securely, add a locking mechanism, and ensure the fencing is the right height for your dog’s needs.
Attaching Panels Securely
Start by selecting durable panels that can withstand weather and your dog’s activity. Use heavy-duty brackets or steel clips to fasten panels to posts tightly. Loose panels can create gaps your dog might squeeze through, so check each connection twice.
Consider using a drill to pre-make holes before screwing panels in. This avoids cracking the wood or bending metal. If you’re using chain-link fencing, zip ties can add extra security along with metal ties.
Adding A Locking Mechanism
A secure gate lock is essential to keep your dog safe and prevent unwanted visitors. Choose locks that are simple for you to operate but tricky for your dog or kids to open. Slide bolts or latch locks with a padlock option are reliable choices.
Think about adding a double-lock system if your dog is a clever escape artist. You might also want to add a lock guard or cover to protect the latch from weather damage. Have you ever had a gate latch fail unexpectedly? It’s worth investing in quality hardware upfront.
Ensuring Proper Height
The fence height depends on your dog’s size and jumping ability. A general rule is at least 6 feet for large or agile dogs, but smaller breeds may need only 4 feet. Too low, and your dog might jump out; too high could be costly and unnecessary.
Check your dog’s behavior before finalizing height. If your dog tries to jump fences, consider adding an inward-facing extension at the top. What has worked best for your dog’s containment needs?
Adding The Roof
Adding a roof to your outdoor dog kennel is more than just a finishing touch—it protects your furry friend from weather elements and enhances the kennel’s durability. A well-designed roof provides shelter from rain, sun, and snow, making the kennel a safe and comfortable space. Let’s look at how you can choose the right roof style, make it waterproof, and secure it firmly.
Choosing Roof Style
Think about your local climate and your dog’s comfort when picking a roof style. A slanted or pitched roof is great for areas with heavy rain or snow because it helps water slide off easily. Flat roofs are easier to build but might require extra waterproofing.
Consider materials too. Corrugated metal sheets are durable and lightweight, while wooden shingles add a natural look but need more upkeep. You might want a removable roof for easy cleaning and repairs—have you thought about what suits your maintenance routine best?
Waterproofing Techniques
Keeping the roof waterproof is crucial to avoid leaks that can ruin the kennel’s interior. Use roofing felt or waterproof membranes under shingles or metal sheets for an extra barrier against water. Seal all joints with waterproof caulk or roofing tape to stop water from sneaking through tiny gaps.
Don’t forget to extend waterproofing down the edges where the roof meets the walls. A good overhang prevents rain from dripping directly onto the kennel walls. Reflect on how much rain your area gets—does your roof design handle those heavy downpours?
Securing The Roof
Once the roof is ready, secure it firmly to withstand wind and other weather conditions. Use galvanized screws or nails that won’t rust over time. Reinforce corners and edges with metal brackets or braces to keep everything in place.
Check stability by gently shaking the roof after installation—if it moves, add more fasteners. Remember, a loose roof can be dangerous for your dog and may cause damage. How confident do you feel about your roof’s strength? Taking time to secure it well now saves hassle later.
Finishing Touches
Finishing touches bring your outdoor dog kennel to life. They improve comfort and protect the structure. These steps ensure your dog enjoys a safe, cozy space.
Painting And Sealing
Choose non-toxic paint safe for pets. Paint adds color and protects wood from weather. Seal all surfaces to prevent water damage. Use a sealant that blocks moisture and resists mold. Let everything dry completely before use.
Adding Bedding And Shade
Place soft bedding inside for warmth and comfort. Use materials like straw, blankets, or pet-safe cushions. Create shade with a canopy or roof extension. Shade keeps your dog cool during hot days. Position the kennel in a spot with natural shade if possible.
Ensuring Proper Drainage
Good drainage stops water from pooling inside. Raise the kennel slightly off the ground using blocks or legs. Use gravel or sand beneath for better water flow. Check the area after rain to ensure no standing water. Proper drainage keeps the kennel dry and clean.
Maintenance Tips
Keeping your DIY outdoor dog kennel in top shape requires regular attention. Maintenance not only extends the life of the kennel but also ensures your dog stays comfortable and safe. Here are some practical tips to help you maintain your kennel effectively.
Regular Cleaning
Clean your dog’s kennel often to prevent dirt and odors from building up. Use mild soap and water to wash floors and walls, avoiding harsh chemicals that could harm your pet.
Remove bedding and toys during cleaning and wash them separately. This routine keeps the space fresh and reduces the risk of pests or bacteria.
Inspecting For Damage
Check the kennel weekly for signs of wear and tear. Look for loose nails, broken boards, or rusted hinges that could hurt your dog or weaken the structure.
Fix small issues immediately to avoid bigger repairs later. Have you noticed any spots where your dog tries to escape? Those areas deserve extra attention.
Seasonal Adjustments
Adjust your kennel according to the season to keep your dog comfortable year-round. In colder months, add insulated bedding or windbreaks to protect against chill.
During summer, ensure there’s plenty of shade and ventilation to prevent overheating. Simple changes can make a big difference in your dog’s outdoor experience.

Credit: pinnonhatch.com
Frequently Asked Questions
What Materials Are Best For A Diy Outdoor Dog Kennel?
Wood and metal are popular for DIY kennels. Wood offers good insulation and is easy to work with. Metal provides durability and security. Use weather-resistant materials to ensure longevity and protect your dog from outdoor elements.
How Much Space Does My Dog Need In A Kennel?
Your dog needs enough room to move comfortably. Measure your dog’s length and add extra space for stretching and lying down. Typically, a kennel should be at least 4 feet by 6 feet for medium-sized dogs.
How Do I Weatherproof An Outdoor Dog Kennel?
Use waterproof sealants on wood surfaces to protect against rain. Add a raised floor to avoid ground moisture. Install a roof or cover to shield from sun and snow. Proper ventilation is essential to prevent overheating.
Can I Build A Kennel On A Budget?
Yes, building a kennel on a budget is possible. Use reclaimed wood or pallets, and basic hardware. Plan carefully to avoid waste. Simple designs reduce costs while maintaining safety and comfort for your dog.
Conclusion
Building your own outdoor dog kennel saves money and gives your pet a cozy space. You control the size, materials, and design to fit your needs. A sturdy kennel keeps your dog safe and comfortable outside. Planning and simple tools make the project easy and fun.
Enjoy watching your dog relax in a space you created with care. Small steps lead to a great result. Start building today and see the difference it makes.

Emily Barker is the founder of ChillDogLife.com, a space dedicated to helping pup parents discover the best dog products, lifestyle tips, and cozy ideas for happier homes.
A lifelong dog lover, Emily combines her passion for pets with a knack for research to share trusted recommendations on everything from toys and furniture to health and everyday care.
Her goal is simple: to make life easier, stylish, and more joyful for dogs and the people who love them.