If you love your dog and want to give them something special, making a dog toy plushie is a great idea. Imagine seeing your furry friend’s tail wag with joy as they play with a toy you made just for them.
You don’t need fancy skills or expensive materials to create a soft, safe, and fun toy. In this guide, you’ll learn simple steps to make a plushie that your dog will love. Keep reading, and by the end, you’ll have a handmade toy that brings happiness and comfort to your best friend.
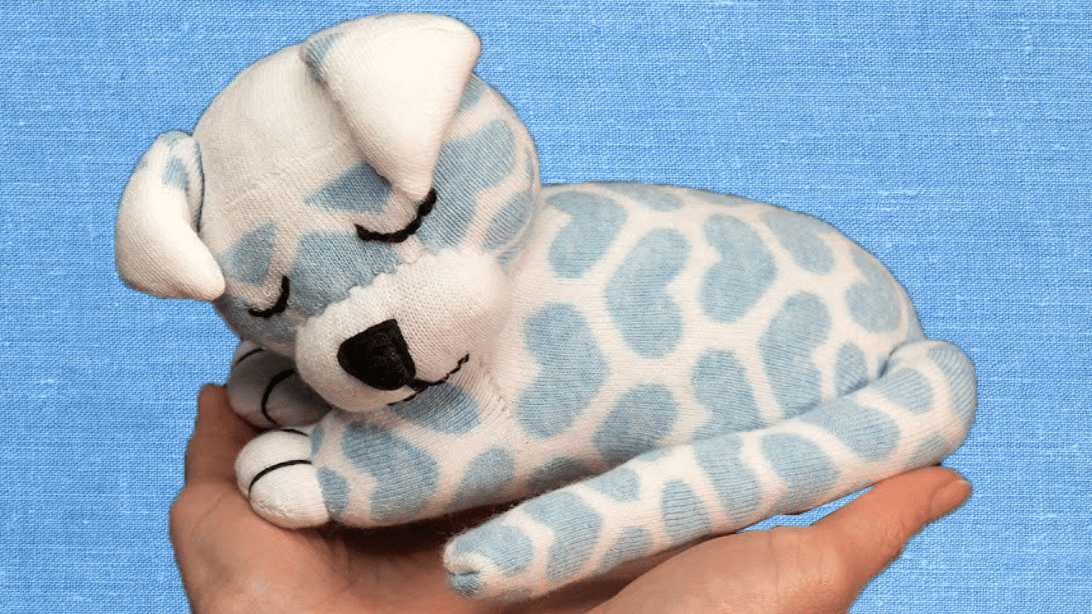
Credit: www.etsy.com
Materials Needed
Gathering the right materials is the first step toward creating a durable and lovable dog toy plushie. Choosing quality supplies ensures your furry friend will enjoy the toy safely and for a long time. Let’s break down what you need to get started.
Choosing Fabric
Pick a fabric that can handle your dog’s chewing and rough play. Durable materials like canvas, denim, or fleece work well because they resist tears and are easy to clean.
Think about your dog’s preferences too. Some dogs love soft textures, while others prefer something tougher. Avoid fabrics that shed fibers easily or contain harmful dyes.
Selecting Stuffing
Stuffing should be safe and non-toxic since dogs might bite through the fabric. Polyester fiberfill is a popular choice because it’s soft, washable, and holds shape well.
You can also use old t-shirts or scraps of fabric as stuffing for a more eco-friendly option. Just make sure the stuffing won’t clump or cause choking hazards if exposed.
Additional Supplies
- Strong thread:Use heavy-duty thread to keep seams secure during playtime.
- Needles or sewing machine:A sturdy needle or machine can handle thick fabrics and multiple layers.
- Scissors:Sharp scissors make cutting fabric cleaner and easier.
- Non-toxic fabric glue (optional):Useful for extra reinforcement or attaching small decorative elements safely.
- Velcro or rope:Consider adding these for interactive features that dogs love.
Have you ever tried making a toy only to find it didn’t last a day? Picking the right materials upfront can save you time and frustration while keeping your dog happy. What fabrics and stuffing do you think your dog would enjoy the most?

Credit: www.youtube.com
Preparing The Pattern
Preparing the pattern is a crucial step in making a dog toy plushie. This stage sets the foundation for the entire project, affecting how your toy will look and feel. Taking your time here ensures a better fit and a more durable final product.
Drawing Your Design
Start by sketching your toy’s shape on paper. Keep it simple—think basic shapes like circles, squares, or bones. You want a design that’s easy to sew and safe for your dog to chew on.
Consider the size of your dog when drawing the pattern. A small plushie for a Chihuahua won’t work for a Labrador. Ask yourself: What shape would my dog enjoy playing with? What parts need extra stuffing or reinforcement?
Use a ruler or measuring tape to make sure your design is symmetrical and sized right. Don’t hesitate to make a few rough drafts until you feel confident. Personal experience taught me that a clear, well-measured pattern saves hours of frustration later.
Cutting The Fabric
Once your design is ready, pin the paper pattern onto your chosen fabric. Felt, fleece, or cotton are great options—sturdy but soft enough for your pet. Make sure the fabric is clean and free of loose threads.
Cut carefully around the edges with sharp fabric scissors. Avoid jagged cuts; smooth edges make sewing easier and reduce the chance of fraying. Remember to cut two identical pieces for the front and back of the plushie.
Don’t forget to add a small seam allowance—about ¼ inch—outside your pattern lines. This extra fabric helps when stitching the pieces together without shrinking the toy. Have you ever sewn something only to find it ended up too small? That’s why this step matters.
Sewing The Plushie
Sewing the plushie is the heart of making a soft dog toy. This step brings your fabric pieces to life. Careful stitching ensures the toy stays strong through playtime. Use simple stitches to join the fabric edges. Sewing neatly shapes the toy and adds durability.
Focus on even stitches for a clean look. Choose thread color that matches your fabric. This keeps the seams less visible. Take your time to make the plushie sturdy and safe for dogs.
Stitching Techniques
Use a backstitch for strong seams. It looks like a continuous line on top. This stitch holds well against tugging and chewing.
Try a whipstitch for closing edges. It loops around the fabric edges to bind them. This stitch is quick and neat for small areas.
Keep stitches about 1/4 inch apart. Too big can let stuffing escape. Too small might make sewing slow and hard.
Leaving An Opening
Leave a small gap before finishing the seams. This opening lets you add stuffing inside the plushie.
Make the opening about 2 to 3 inches long. It should be enough to push stuffing in easily.
Once stuffed, close the opening with small, tight stitches. This seals the plushie and keeps stuffing safe inside.
Stuffing The Toy
Stuffing the toy is a key step in making a dog toy plushie. The right stuffing gives the toy shape and softness. It also makes sure the toy is safe and fun for your dog. Use clean, pet-safe stuffing materials like polyester fiberfill or old, clean fabric scraps. Avoid materials that can hurt your dog if they chew on the toy.
Filling Evenly
Fill the toy slowly and gently. Spread the stuffing out to all parts of the toy. Push the stuffing into corners and edges. This keeps the toy’s shape balanced and smooth. Use your fingers or a small tool to reach tight spots. Check that the toy feels the same all around.
Avoiding Overstuffing
Don’t add too much stuffing. Overstuffed toys become hard and less fun to chew. They also stress the seams and can tear easily. Leave a little space inside for soft squishiness. Press the toy lightly to test its softness. The toy should feel firm but still soft and flexible.
Finishing Touches
Finishing touches turn your dog toy plushie from a simple stuffed shape into a fun and safe playmate. This stage is all about securing your work and adding personality. A well-done finish not only looks great but also keeps your furry friend safe during playtime.
Closing The Opening
After stuffing your plushie, you’ll have a small opening left to close. Use a needle and thread to sew this shut with small, tight stitches. This keeps the stuffing from coming out and makes the toy more durable.
Try the ladder stitch or slip stitch for a nearly invisible seam. If you’ve ever had a toy fall apart after a few rough play sessions, you know how important this step is. Take your time here; a strong closure means the toy will last longer, no matter how enthusiastic your dog gets.
Adding Details
Details give your plushie character and make it more engaging for your dog. Think about what your pet loves—like squeakers or crinkly sounds—and add them inside before closing the toy. You can also sew on eyes, noses, or patches using felt or embroidery thread.
Be sure to avoid small parts that could be chewed off and swallowed. Instead, use securely stitched or embroidered features. Adding these little touches not only makes the toy unique but also more interactive, capturing your dog’s attention and encouraging play.
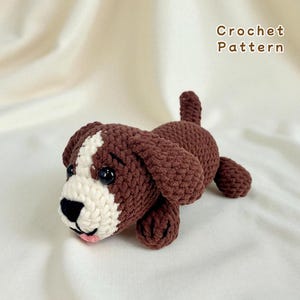
Credit: diyjoy.com
Safety Tips
Making a dog toy plushie is a fun and rewarding project, but safety should always be your top priority. Choosing the right materials and ensuring the toy is sturdy can protect your furry friend from potential hazards. Let’s look at some key safety tips that will help you create a toy that’s both enjoyable and safe for your dog.
Choosing Pet-safe Materials
Not all fabrics and fillings are safe for dogs. Avoid materials that can easily tear or contain harmful chemicals. Opt for natural fibers like cotton or fleece, which are gentle on your dog’s mouth and skin.
Use non-toxic, pet-safe stuffing such as polyester fiberfill designed for toys or even scraps of old, clean fabric. Steer clear of beads, buttons, or small parts that your dog could swallow. Have you checked the labels on your fabric to confirm they’re free from dyes and chemicals?
Inspecting For Durability
Dogs can be rough with their toys, so durability is crucial. Double-stitch all seams to prevent stuffing from coming out. This simple step can save you from constant repairs and keep your dog from ingesting loose fibers.
Test the toy by tugging and pulling on it yourself. If it feels weak or starts to come apart, reinforce those areas before giving it to your dog. How often do you inspect your dog’s toys for wear and tear?
Customization Ideas
Customization makes your dog toy plushie unique and fun. It allows you to tailor the toy to your dog’s tastes and needs. Custom touches can also make the toy more durable and entertaining. Simple changes can turn a plain plushie into a favorite plaything.
Personalizing With Colors
Choose colors that suit your dog’s personality. Bright colors catch a dog’s eye quickly. Use fabric in your dog’s favorite shades. Mixing colors creates a playful, cheerful look. Try patterns like stripes or spots to add style. Use safe, non-toxic dyes or fabrics for safety.
Adding Squeakers Or Textures
Squeakers make toys exciting by adding sound. Place a squeaker inside the plushie for hidden fun. Use different textures to engage your dog’s senses.
- Soft fleece for comfort and cuddling
- Rough burlap for chewing satisfaction
- Crinkly fabric to add noise and interest
- Rubber patches for durability and teething
Mix textures to keep your dog curious. This makes the toy more interesting and lasting.
Frequently Asked Questions
What Materials Do I Need For A Dog Toy Plushie?
To make a dog toy plushie, you’ll need fabric, stuffing, scissors, and a needle with thread. Choose durable fabric like fleece or denim for longevity. You may also want to add squeakers or bells for added fun. These materials ensure a safe, engaging toy for your dog.
How Do I Ensure The Plushie Is Safe?
Ensure safety by using non-toxic materials and avoiding small, detachable parts. Double-stitch seams to prevent tearing. Regularly inspect the plushie for wear and tear. Replace it if you notice any damage. This way, your dog can enjoy the toy safely.
Can I Wash The Dog Toy Plushie?
Yes, you can wash the dog toy plushie. Use mild detergent and cold water for handwashing. Alternatively, use a gentle cycle in the washing machine. Ensure the toy is completely dry before giving it back to your dog. This maintains hygiene and freshness.
How Long Does It Take To Make One?
It typically takes about 1-2 hours to make a dog toy plushie. This depends on your sewing skills and complexity of the design. With practice, the process becomes faster. Enjoy the creative process and your dog will appreciate the effort.
Conclusion
Making a dog toy plushie is fun and simple. You only need a few materials and some time. This project lets you create a safe toy for your dog. Handmade toys often last longer and are more special. Plus, your dog will love playing with something you made.
Try different shapes and fabrics to find what your dog likes best. Enjoy the process and watch your dog’s happiness grow. Crafting together builds a stronger bond between you and your pet. Give it a try—you might make your dog’s new favorite toy!

Emily Barker is the founder of ChillDogLife.com, a space dedicated to helping pup parents discover the best dog products, lifestyle tips, and cozy ideas for happier homes.
A lifelong dog lover, Emily combines her passion for pets with a knack for research to share trusted recommendations on everything from toys and furniture to health and everyday care.
Her goal is simple: to make life easier, stylish, and more joyful for dogs and the people who love them.