Looking for a fun and affordable way to keep your dog happy and healthy? Making your own dog rope toys is easier than you think.
Not only will you save money, but you’ll also create a durable toy that your dog will love to chew and play with. You’ll discover simple steps to craft these toys using materials you probably already have at home. Ready to give your furry friend a new favorite toy?
Let’s get started!
Materials Needed
Making dog rope toys is simple and fun. You only need a few materials to get started.
Choose safe and strong supplies to ensure your dog enjoys the toy safely.
Choosing The Right Rope
Pick rope made from natural fibers like cotton. These are soft and safe for dogs to chew.
Avoid ropes with loose threads or synthetic materials. These can harm your dog if swallowed.
- Cotton rope is strong and washable
- Polypropylene rope is durable but less safe
- Avoid ropes with dyes or chemicals
- Choose rope thickness based on your dog’s size
Additional Supplies
Besides rope, gather some extra supplies to make the toy easy and safe to use.
Scissors help cut the rope cleanly. Tape can stop rope ends from fraying.
- Sharp scissors for cutting rope
- Masking or duct tape to seal rope ends
- Measuring tape to cut correct lengths
- Optional: fabric glue for extra hold

Credit: www.allwinedesigns.com
Preparing The Rope
Preparing the rope is the first step in making a dog rope toy. It ensures the toy is safe and durable for your dog to play with.
Good preparation helps the rope last longer and prevents it from unraveling during play.
Measuring And Cutting
Measure the length of rope based on your dog’s size and chewing strength. A longer rope works well for bigger dogs and tugging games.
- Use a tape measure or ruler for accuracy.
- Cut the rope cleanly with sharp scissors.
- Leave extra length for knots to hold securely.
- Cut several strands if making a multi-rope toy.
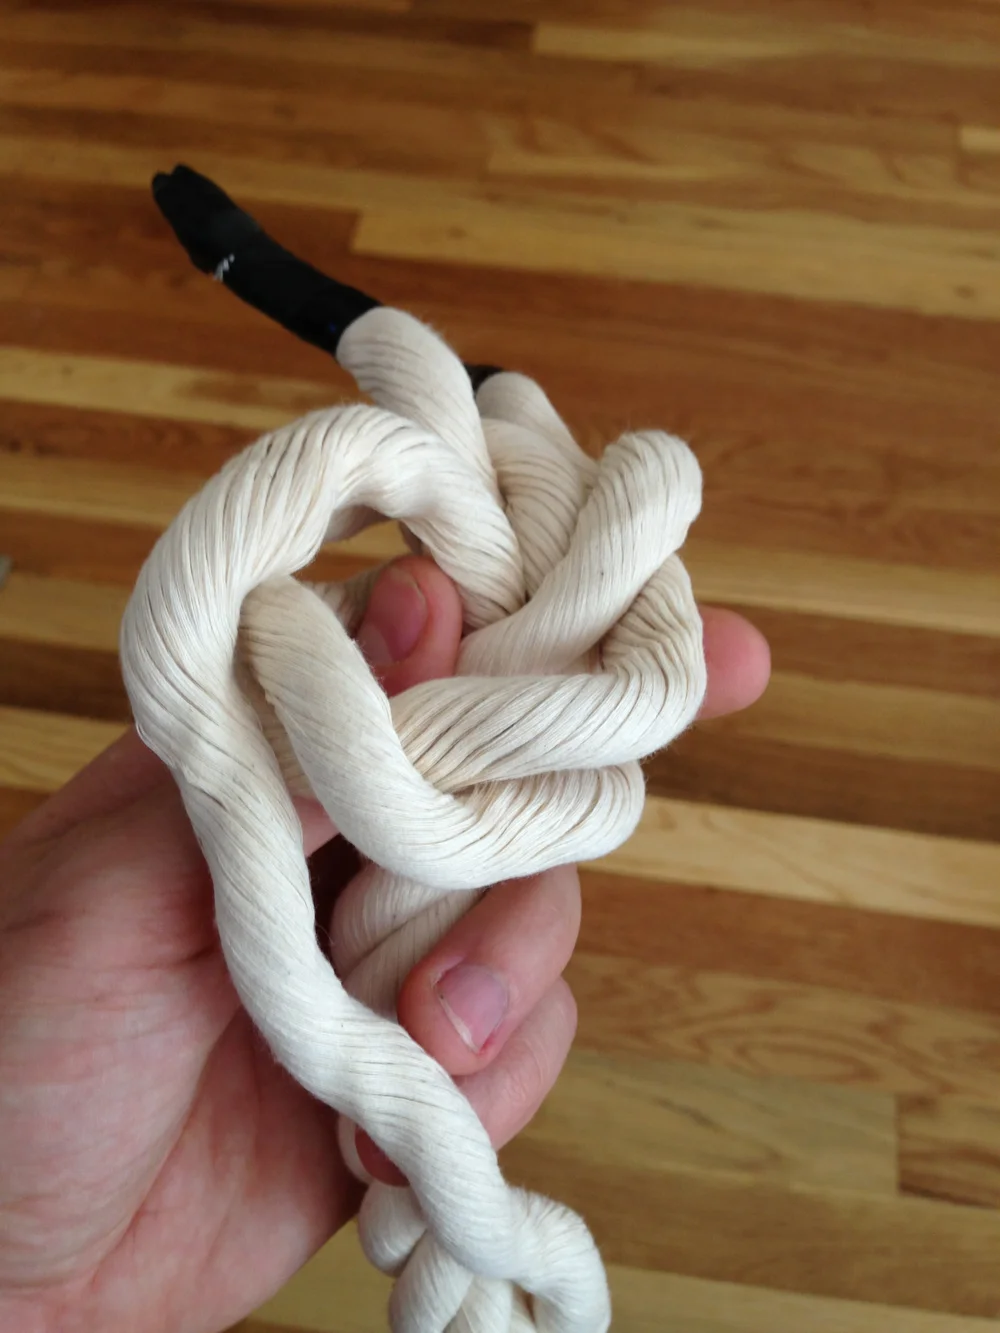
Securing The Ends
Securing the rope ends stops the fibers from fraying. This keeps the toy safe and neat.
Here are common methods to secure the rope ends:
| Method | Description | Tools Needed |
|---|---|---|
| Melting | Use heat to melt synthetic rope ends. | Lighter or match |
| Whipping | Wrap thin thread tightly around ends. | Strong thread and needle |
| Knots | Tie tight knots at each end. | None |
| Glue | Apply fabric glue to ends. | Fabric glue |
Basic Knot Techniques
Making dog rope toys is fun and easy. Knowing simple knots helps you create strong toys.
Basic knots hold the ropes tightly. They keep the toy safe for your dog to play with.
Square Knot
The square knot ties two ropes together. It looks like a flat, neat knot that stays firm.
This knot is good for joining rope ends in dog toys. It does not slip or come loose easily.
- Hold one rope end in each hand.
- Cross right rope over left rope and tuck it under.
- Cross left rope over right rope and tuck it under again.
- Tighten the knot by pulling both ends.
Overhand Knot
The overhand knot is simple and quick to make. It creates a small knot on a rope end.
Use this knot to stop rope ends from fraying or slipping through holes. It adds safety to toys.
- Make a loop with the rope end.
- Pass the rope tip through the loop.
- Pull the end tight to form the knot.
Credit: www.allwinedesigns.com
Creating Simple Rope Toys
Making rope toys for dogs is easy and fun. These toys help keep dogs active and happy.
You only need a few materials and basic knot skills. Let’s explore two simple rope toy ideas.
Braided Tug Toy
A braided tug toy is strong and perfect for playing tug-of-war. It uses three or more ropes braided tightly.
Choose thick cotton ropes to protect your dog’s teeth. Cut the ropes to equal lengths before braiding.
- Gather three ropes and tie a knot at one end.
- Braid the ropes tightly until you reach the end.
- Secure the end with a tight knot.
- Trim any loose ends for a neat finish.
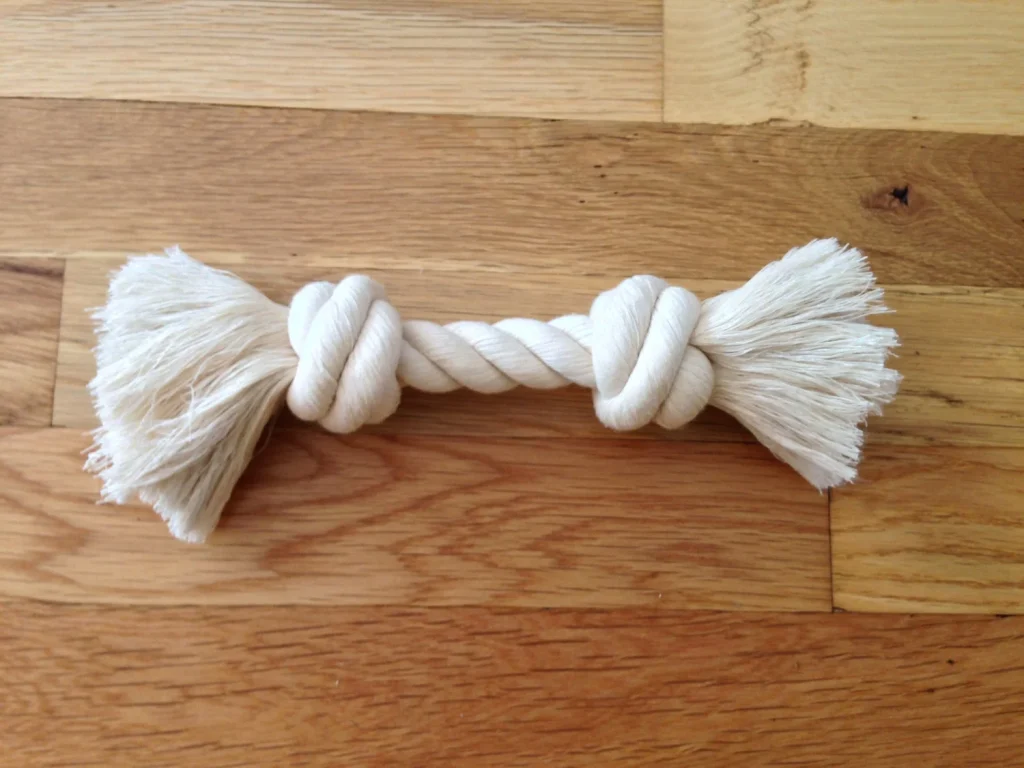
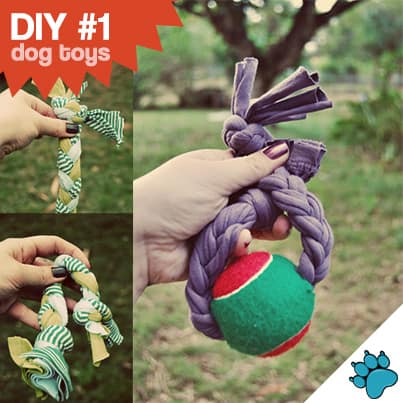
Knotted Ball Toy
The knotted ball toy is a fun chew toy made by tying rope knots into a ball shape. It is simple to make and durable.
Use a long rope and fold it to form loops. Tie multiple knots close together to create a ball that your dog can chew.
- Start by making a large knot at one end of the rope.
- Make several smaller knots around the large knot.
- Keep the knots tight to form a solid ball.
- Leave some rope ends for your dog to chew on.
Advanced Rope Toy Designs
Creating dog rope toys can be fun and creative. Advanced designs add strength and interest to your toys.
These designs use more rope strands and special features to make toys last longer and be easier to hold.
Multi-strand Braids
Multi-strand braids use more ropes than simple braids. This makes the toy thicker and stronger.
You can use five or more strands to create patterns that look nice and hold well during play.
- Start by cutting equal lengths of rope
- Secure the ropes at one end
- Weave the strands over and under in a pattern
- Tighten the braid as you go
- Tie a knot at the end to keep strands in place
Adding Handles
Handles make it easier to throw and hold the toy. They also add extra fun for tugging games.
Attach a loop or braided section at one or both ends of the rope toy for a good grip.
- Create a loop by folding a rope end back and tying a strong knot
- Braid a section tightly for a firm handle
- Make sure the handle is secure and comfortable to hold
- Test the handle by pulling gently before giving it to your dog
Ensuring Toy Durability
Making dog rope toys that last can be fun and rewarding. You’ll want to use materials and methods that ensure your toy can withstand rough play.
With the right materials and care, your homemade dog toys can provide hours of entertainment. Let’s explore how to make them durable.
Choosing Durable Materials
Start by selecting strong materials for your rope toy. Consider materials that resist wear and tear and are safe for dogs.
- Cotton ropes are soft yet durable
- Nylon ropes add extra strength
- Avoid materials that fray easily
Regular Maintenance Tips
Regular maintenance helps your toy last longer. Check the toy often for signs of wear and make necessary repairs.
Inspect the toy after each play session. Remove any loose threads and wash if dirty. This keeps the toy safe for your pet.
| Maintenance Task | Frequency |
| Inspect for damage | Weekly |
| Wash the toy | Bi-weekly |
| Repair loose parts | As needed |
Safety Tips For Diy Toys
Making dog rope toys at home can be fun and rewarding. It’s important to keep safety in mind while crafting these toys.
Ensuring safety in homemade toys protects your dog from harm. Follow these guidelines for a safe playtime experience.
Avoiding Small Parts
Small parts can be dangerous for dogs. They may choke on or swallow these pieces.
Use large, sturdy materials for your dog toys. This reduces the risk of choking hazards.
- Avoid buttons and beads
- Choose thick, durable rope
- Ensure all parts are tightly secured
Supervised Play
Always supervise your dog while they play with homemade toys. This helps prevent accidents.
Watch for signs of wear and tear on the toy. Replace the toy if it becomes damaged.
| Signs to Watch For | Actions to Take |
| Fraying rope | Trim or replace |
| Loose knots | Tighten immediately |
| Chewed up ends | Cut off or discard |
Benefits Of Homemade Rope Toys
Making rope toys for your dog at home is a smart choice. These toys are safe, fun, and easy to create.
Homemade rope toys offer many advantages over store-bought ones. You can control the materials and design.
Cost Savings
Creating rope toys at home saves money. You use old clothes or cheap ropes instead of buying new toys.
Store toys often cost more and wear out fast. Homemade toys can be made cheaply and replaced easily.
- Use old t-shirts or fabric scraps
- Buy rope in bulk for lower prices
- Make several toys for the price of one store toy
Customization Options
You can choose the size and color of your dog’s rope toy. This fits your dog’s chewing style and preferences.
Adding knots or braids changes the toy’s texture. This keeps your dog interested and active.
- Make toys in different lengths and thicknesses
- Mix colors to create fun patterns
- Add knots for better grip and chewing
Bonding With Your Dog
Making toys together helps you connect with your dog. Your dog enjoys playing with something you made.
It shows your care and attention. Playtime becomes more special with a homemade toy.
- Spend quality time crafting toys
- Use the toy for fun games like tug-of-war
- Strengthen your dog’s trust and happiness
Credit: pethero.co.za
Frequently Asked Questions
What Materials Are Needed To Make Dog Rope Toys?
You need sturdy cotton ropes, scissors, and optional fabric scraps. Natural fibers are safest for dogs. Avoid synthetic ropes that may fray easily or contain harmful chemicals.
How Do You Braid Ropes For Dog Toys?
Start by cutting three equal rope strands. Knot one end and braid tightly. Secure the other end with a knot to prevent unraveling.
Are Homemade Dog Rope Toys Safe For Puppies?
Yes, if made with non-toxic, durable materials. Always supervise playtime to prevent choking. Replace toys when ropes start to fray or break.
How Long Does It Take To Make A Dog Rope Toy?
Typically, it takes 10 to 20 minutes. Braiding and knotting are quick steps. Time depends on toy size and complexity.
Conclusion
Making dog rope toys is fun and simple. You only need a few materials. These toys keep your dog happy and active. They also save money compared to store-bought toys. Plus, homemade toys show your care and love. Try different knots and colors for variety.
Always watch your dog while playing. This way, you keep them safe and entertained. Start making your dog’s rope toy today. Your furry friend will thank you with wagging tails!

Emily Barker is the founder of ChillDogLife.com, a space dedicated to helping pup parents discover the best dog products, lifestyle tips, and cozy ideas for happier homes.
A lifelong dog lover, Emily combines her passion for pets with a knack for research to share trusted recommendations on everything from toys and furniture to health and everyday care.
Her goal is simple: to make life easier, stylish, and more joyful for dogs and the people who love them.