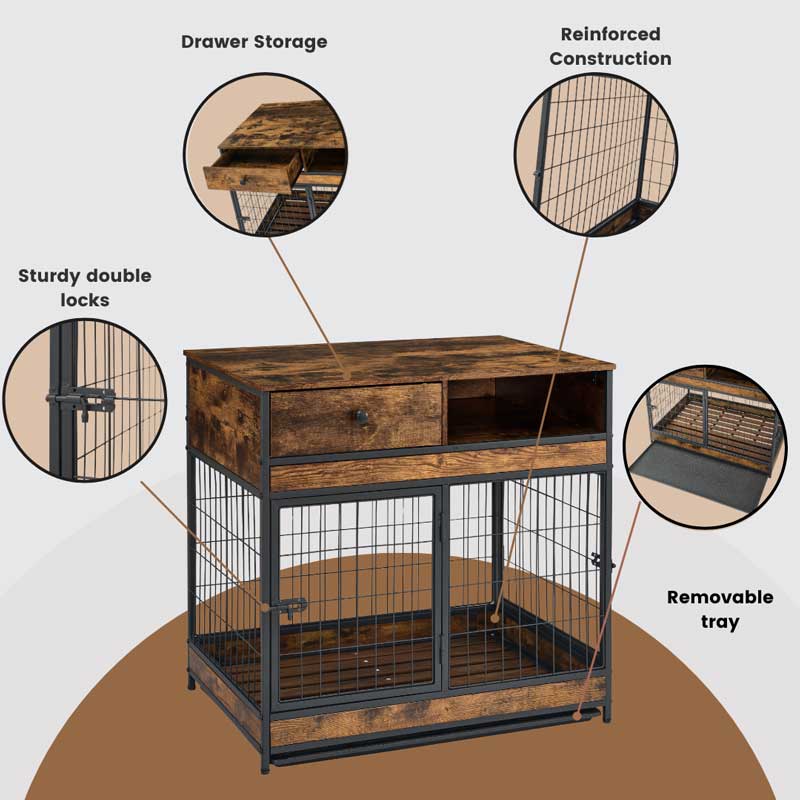
If you’ve ever struggled with taking apart your dog crate, you’re not alone. Knowing how to disassemble your dog crate quickly and safely can save you time, frustration, and even prevent damage to the crate or harm to yourself.
Whether you need to move, clean, or store it, this guide will show you simple steps to make the process smooth and hassle-free. Keep reading to discover easy tips that will have you breaking down your dog crate like a pro in no time.
Tools Needed
Disassembling a dog crate requires a few simple tools. Having the right tools makes the process faster and easier. It also prevents damage to the crate parts. Prepare all tools before starting to avoid interruptions.
Most dog crates use screws, bolts, or clips. You will need tools that fit these fasteners. Basic hand tools are often enough for the job.
Essential Screwdrivers
Screwdrivers are key for loosening and removing screws. A flathead and a Phillips head screwdriver cover most screw types. Choose screwdrivers with comfortable grips for better control.
Wrenches And Pliers
Wrenches help with bolts and nuts that hold crate panels. Adjustable wrenches work well for different sizes. Pliers are useful for gripping and pulling clips or pins.
Allen Keys (hex Keys)
Some dog crates use hex screws. A set of Allen keys is necessary to remove these fasteners. They come in various sizes, so a complete set is best.
Optional Tools
- Rubber mallet – to gently tap loose stuck parts.
- Utility knife – to cut zip ties or tape.
- Work gloves – protect your hands during disassembly.
Credit: www.msn.com
Prepare The Crate
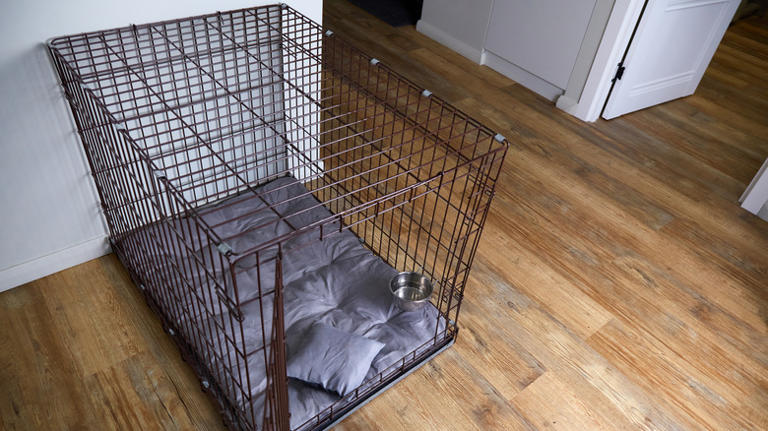
Clear the area around the crate to have enough space for disassembly. Remove any bedding or toys inside the crate before starting. Check for screws or clips that hold the crate parts together.
Preparing your dog crate for disassembly is an essential first step that ensures a smooth and hassle-free process. A well-prepared crate not only makes the task easier but also prevents any damage to the crate or injury to yourself. Let’s dive into the practical steps you need to take to prepare your crate properly.Remove Bedding And Accessories
Begin by clearing out all bedding and accessories from the crate. This includes blankets, cushions, toys, and any other items your dog might use for comfort. Not only does this make the crate lighter and easier to handle, but it also prevents any of these items from getting damaged or lost during the disassembly process. Consider this: have you ever tried to fold a crate with a bulky blanket still inside? It’s not a pleasant experience! By removing everything first, you avoid the frustration and potential mess. Once you’ve cleared the interior, take a moment to inspect and clean these items if needed.Secure The Door
Before you start taking the crate apart, ensure the door is securely fastened. This might seem like a small detail, but it can save you from unexpected pinches or scratches. A loose door can swing open unpredictably, creating an obstacle or even causing injury. Use any built-in locks or latches to keep the door firmly closed. If your crate doesn’t have these features, consider using a simple cord or twist-tie. Securing the door not only keeps you safe but also helps maintain the structural integrity of the crate during disassembly. Have you ever wondered why small precautions make such a big difference? By taking these preparatory steps, you set yourself up for success and ensure that your crate is ready for a seamless breakdown.Locate Fasteners
Before you start disassembling your dog crate, the first thing you need to do is locate all the fasteners holding it together. Fasteners are the key points that secure the crate’s parts, and knowing where they are will make your task smoother and safer. Sometimes these fasteners are obvious, but other times they can be cleverly hidden, so taking a careful look is essential.
Identify Clips And Screws
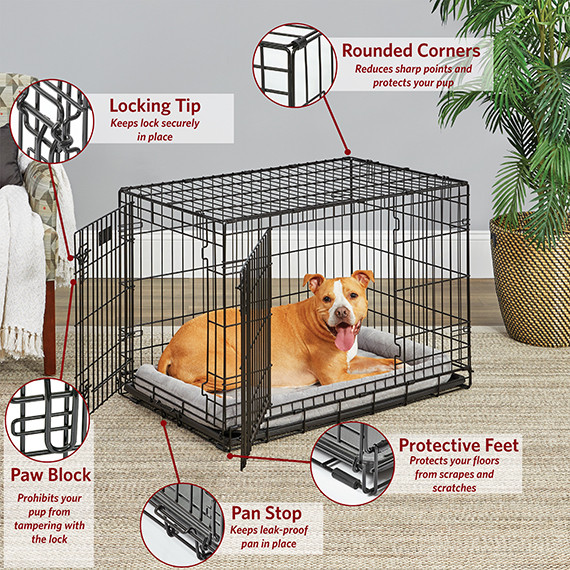
Look around the edges and corners of the crate for any clips or screws. Clips often snap into place and can be released by pressing or pulling, while screws usually require a screwdriver. You might find plastic clips that need gentle prying or metal screws that need the right bit to avoid stripping.
If you have a wire crate, the clips might be small metal hooks securing panels. For plastic crates, screws are common, sometimes covered by stickers or rubber feet. Check the crate’s manual if you have it handy—it can save you time by showing exactly where these fasteners are located.
Check For Hidden Locks
Hidden locks can be tricky because they’re designed to keep the crate secure. Look under handles, behind panels, or inside corners where a latch might be concealed. Sometimes, there are sliding locks or twist mechanisms that are easy to miss but crucial to unlock before disassembly.
Have you ever tried to take apart a crate only to find it won’t budge? That’s often because of a hidden lock you overlooked. Take your time to inspect all sides carefully. Using a flashlight can help reveal these subtle details and prevent damage to your crate or tools.
Disassemble Panels
Disassembling the panels of your dog crate is a straightforward task once you understand how the parts connect. Taking apart each panel carefully can save you from frustration and potential damage to the crate or yourself. Let’s focus on the key sections to remove: the side panels and the top and bottom parts.
Detach Side Panels
Start with the side panels, as these often hold the crate structure together. Look for clips, hinges, or bolts securing these panels to the frame. Sometimes, you’ll find simple latches that just need a firm pull or a small push to release.
Use your hands or a screwdriver to undo screws or fasteners. If you spot pins or hooks, gently wiggle them free without forcing to avoid bending metal or breaking plastic. Remember, patience here prevents damage and keeps the panels reusable.
Have you noticed how some crates use different locking styles on the sides? This can affect how easily you detach them. If your crate’s panels feel stuck, double-check for hidden fasteners or locking tabs you might have missed.
Remove Top And Bottom Sections
The top and bottom sections usually connect to the side panels and may have their own set of fasteners. Look underneath the crate for screws or clips holding the bottom section in place. Removing these first often loosens the entire structure.
For the top panel, check if it hinges open or is fully removable. Some crates have a top that swings open; others require full detachment. Use a screwdriver or your hands to carefully undo the connectors while supporting the panel to avoid dropping it.
If you’ve ever struggled with a stubborn bottom panel, try tilting the crate slightly. Gravity can help free the panel once the screws or clips are undone. What’s the best tool you’ve found for this task? A small ratchet or a magnetic screwdriver can make a big difference.
Handle Wire Crates
Handling wire crates can be tricky if you don’t know where to start. These crates are built to be sturdy, but they also come apart in sections that make them easier to move or store. Knowing how to carefully separate and fold the crate can save you time and prevent damage to the wires or your hands.
Separate Wire Sections
Start by locating the latches or clips that hold the wire panels together. These are usually found at the corners or edges where the panels meet.
Gently unlock or unclip these connectors one by one. Avoid forcing the wires apart, as bending them can cause permanent damage.
If the crate has a removable tray at the bottom, take it out first to lighten the load and give you more room to work with.
Do you notice any rust or stiffness in the clips? Applying a little lubricant can help loosen them up, making separation smoother and safer.
Fold Crate For Storage
Once the sections are separated, look for the folding points. Most wire crates are designed to fold flat by collapsing the sides inward.
Carefully push the sides toward the center, folding the crate down layer by layer. This not only makes it compact but also protects the wires from bending.
Secure the folded crate with a bungee cord or strap to keep it tight and easy to carry. This also prevents it from accidentally springing open while in storage.
Have you tried folding your crate without removing the bottom tray? Removing it first usually makes folding easier and reduces the risk of pinching your fingers.
Credit: www.rayallen.com
Store Parts Safely
Storing the parts of your dog crate safely after disassembly is key to keeping everything intact and ready for the next use. Misplaced screws or bent panels can turn a simple reassembly into a frustrating project. Taking a few extra minutes to organize and label your crate components can save you time and headaches later on.
Organize Small Pieces
Small parts like screws, bolts, and connectors are easy to lose. Use clear plastic bags or small containers to keep them together. Group similar items by size or type to avoid confusion.
I once tossed all the crate screws into a single box and spent hours sorting them before reassembling. Now, I always keep these tiny pieces separate and it makes a huge difference. Consider using a divided pill organizer or a tackle box for even better sorting.
Label Components
Labeling each part helps you quickly identify what goes where. Use masking tape or sticky labels to mark panels, rods, and fasteners. Write simple notes like “door panel” or “base frame” to avoid guesswork.
When I labeled my crate parts, reassembly was smooth and fast. Without labels, you might find yourself wondering which piece fits where, wasting valuable time. Think about how you’ll feel assembling the crate later—clear labels make the process almost effortless.
Tips For Quick Breakdown
Breaking down a dog crate quickly saves time and effort. Proper preparation and careful steps make the process smooth. Follow simple tips to keep the work safe and organized. These tips help avoid damage and frustration during disassembly.
Work In A Clear Space
Clear an area free of clutter before starting. A tidy space allows easy movement around the crate. It prevents parts from getting lost or damaged. Use a flat surface to keep pieces steady. Leave enough room for the crate to unfold and fold.
Follow Manufacturer Instructions
Check the manual or guide that came with the crate. Each model has unique parts and locking systems. Following instructions prevents breaking parts accidentally. Look for diagrams or step-by-step guides in the manual. Keep screws and small parts in a container for safety.
Credit: www.impactdogcrates.com
Frequently Asked Questions
How Do I Safely Disassemble A Dog Crate?
To disassemble safely, first remove your dog and any bedding. Use appropriate tools like screwdrivers or wrenches. Follow the manufacturer’s instructions closely. Keep all parts organized for easy reassembly. Work slowly to avoid damaging the crate or hurting yourself.
What Tools Are Needed To Take Apart A Dog Crate?
Common tools include a screwdriver, wrench, and pliers. These help remove screws, bolts, and clips. Check your crate’s manual for specific tools. Having a small container to store hardware is helpful. Prepare your workspace to keep everything organized.
Can I Disassemble A Dog Crate Without Damaging It?
Yes, by carefully following instructions and using the right tools. Avoid forcing parts apart to prevent damage. Keep all hardware safe for reassembly. Handle plastic or metal parts gently. Taking your time ensures the crate remains intact.
How Long Does It Take To Disassemble A Dog Crate?
Disassembly usually takes 15 to 30 minutes, depending on the crate’s size and complexity. Smaller crates are quicker. Larger crates with more parts take longer. Your familiarity with the crate and tools also impacts time.
Conclusion
Disassembling a dog crate is easier than it seems. Take your time and follow each step carefully. Keep all parts organized to avoid losing anything. Use the right tools to make the process smooth. A well-taken-apart crate saves space and helps with cleaning.
Remember, patience is key to avoid damage. Your dog’s safety comes first when reassembling. Now you can move or store the crate without stress. Simple steps lead to great results.

Emily Barker is the founder of ChillDogLife.com, a space dedicated to helping pup parents discover the best dog products, lifestyle tips, and cozy ideas for happier homes.
A lifelong dog lover, Emily combines her passion for pets with a knack for research to share trusted recommendations on everything from toys and furniture to health and everyday care.
Her goal is simple: to make life easier, stylish, and more joyful for dogs and the people who love them.