If you’ve ever tried to move or clean your dog crate, you know it’s not always easy to take apart. But don’t worry—disassembling your dog crate doesn’t have to be a frustrating task.
In this guide, you’ll learn simple, step-by-step tips to break down your crate quickly and safely. Whether you’re packing for a trip, storing it away, or just giving it a good clean, these easy instructions will save you time and effort.
Keep reading, and you’ll be surprised how simple the process can be!
Credit: www.rayallen.com
Tools Needed
Disassembling a dog crate requires a few basic tools. These tools help make the process smooth and safe. Having the right tools saves time and avoids damage to the crate.
Gathering these items before starting will make the task easier. Most tools are common and easy to find at home or a local store.
Phillips Head Screwdriver
This tool is essential for removing screws that hold the crate parts together. Most dog crates use Phillips screws. Choose a screwdriver that fits the screw heads well to avoid stripping.
Flathead Screwdriver
A flathead screwdriver helps pry apart parts or remove flat screws. It also assists in lifting clips or panels gently. Keep one nearby for any unexpected needs.
Pliers
Pliers help grip and turn nuts or small bolts. They are useful for holding parts steady while loosening fasteners. Needle-nose pliers work well for tight spaces.
Allen Wrench (hex Key)
Some crates use hex bolts instead of regular screws. An Allen wrench fits these bolts perfectly. Check the crate’s fasteners to see if this tool is needed.
Rubber Mallet
A rubber mallet can tap loose stuck parts without causing damage. It is gentler than a metal hammer. Use it to separate parts that are tightly fitted.
Work Gloves
Wearing gloves protects your hands from sharp edges and pinches. Gloves also improve grip on tools and crate parts. Choose comfortable gloves that allow good movement.

Credit: www.msn.com
Prepare The Crate
Clear the area around the crate to have enough space for disassembly. Gather necessary tools like screwdrivers or pliers before starting. Ensure your pet is safely away to avoid stress during the process.
Before diving into disassembling a dog crate, it’s essential to prepare the crate properly. This preparation ensures a smooth process and helps prevent any damage to the crate or injury to yourself. By taking a few preliminary steps, you’ll make the disassembly quicker and more efficient.Clear The Inside
Start by removing all items from the crate. This includes bedding, toys, and any feeding dishes. Clearing these items not only makes the crate lighter but also prevents any interference during disassembly. Once the crate is empty, check for any small objects that might have fallen into corners or under mats. You might be surprised at what you find! Clearing the crate also gives you a clean slate to work with, which is both safe and practical.Secure Loose Parts
Identify any loose parts that could potentially fall off during disassembly. These might include bolts, screws, or panels that aren’t tightly secured. Use a small container to store these parts as you remove them to avoid losing anything crucial. Double-check hinges and latches. Sometimes, these components might require a gentle twist or turn to secure them temporarily. This step ensures that nothing unexpectedly drops or shifts as you start breaking down the main structure. Taking these preparatory steps saves time and minimizes frustration. Are you ready to transform the daunting task of disassembly into a straightforward process?Remove Accessories
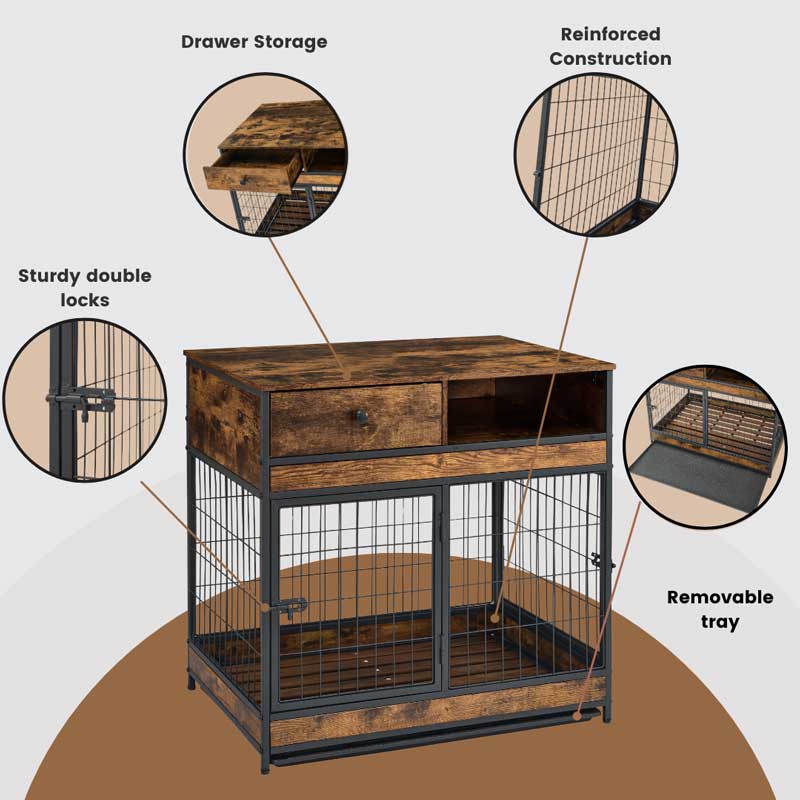
Removing accessories from your dog crate is an essential step before disassembling it. These parts can make the crate bulky and harder to manage. Clearing out trays, pads, doors, and locks not only simplifies the process but also protects these components from damage.
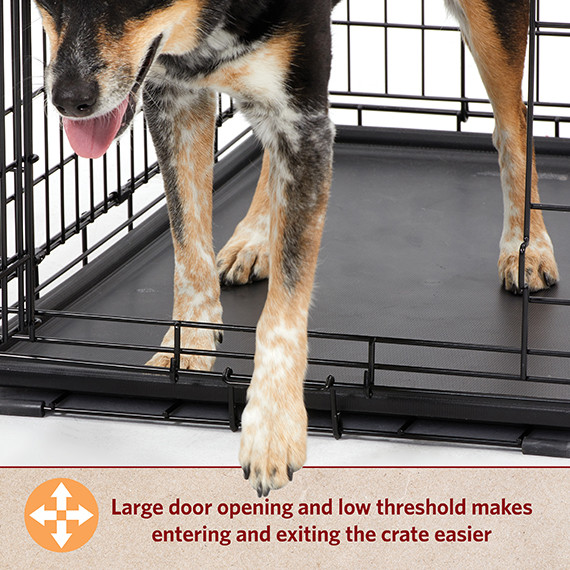
Take Out Trays And Pads
Start by sliding out any trays that sit at the bottom of the crate. These trays often collect dirt and debris, so removing them early helps keep your workspace cleaner. If your crate has pads or cushions, take them out carefully to avoid tearing or staining.
Sometimes trays are secured with clips or tabs—make sure to release these gently to prevent breakage. If the pad is attached with Velcro or straps, unfasten those before pulling it out. Have you noticed how much easier the crate feels once these items are removed?
Detach Doors And Locks
Doors and locks can be the trickiest accessories to remove. Check if your crate has screws or bolts holding the door in place and get the right tools ready. Some doors simply lift off their hinges once you release the locking mechanism.
Locks may be integrated or separate pieces—either way, remove them carefully to avoid bending or snapping metal parts. If your dog has chewed on the locks, inspect them closely for damage before detaching. What’s your experience with stubborn crate locks? Sometimes a little WD-40 can make a big difference.
Disassemble Panels
Disassembling the panels of your dog crate is a key step to make storage or transport easier. It’s not as tricky as it sounds, but knowing where to start can save you time and frustration. Your goal is to carefully separate each panel without damaging the connectors or the metal frame.
Locate Connection Points
First, take a close look at your crate’s frame. Connection points are usually found where the panels meet—often at corners or along the edges. These can be screws, clips, or metal hooks holding the panels together.
Check for small bolts or wing nuts if your crate is metal. Plastic crates may have snap-together clips or tabs. Knowing the type of connection helps you decide the right tool to use.
Have you noticed any loose or missing parts? This can indicate weak spots where disassembly might be easier or where you need extra care to avoid breaking something.
Unscrew Or Unclip Panels
Once you’ve identified the connection points, use the appropriate tool to release the panels. A screwdriver fits most screws, while your fingers or a flat tool can help with clips.
Work slowly and keep the removed screws or clips in a small container. Losing these small parts can turn reassembly into a frustrating scavenger hunt.
If a panel feels stuck, don’t force it. Look again for hidden clips or screws. Sometimes a panel will slide out after you release one side.
Fold Or Separate Frame
Folding or separating the frame is a key step in disassembling a dog crate. It helps to make the crate compact and easy to carry or store. Understanding how the frame works allows you to handle the crate without damage. The process varies slightly based on the crate design but follows simple principles.
Collapse Hinges
Most dog crates have hinges that allow the frame to fold flat. Locate the hinges on the crate’s corners or sides. Gently press or lift the hinge locks to release them. Move the frame panels inward to fold the crate. Make sure all hinges are fully collapsed before folding. This prevents bending or breaking the metal or plastic. Folding the hinges reduces the crate’s size drastically. It also makes the crate easier to transport in a car or carry by hand.
Separate Frame Sections
Some crates have sections connected by clips or bolts instead of foldable hinges. Identify the connection points between frame sections. Use a screwdriver or wrench if bolts secure the sections. Carefully remove the fasteners to separate the panels. Keep the bolts and screws in a safe place for reassembly. If clips hold the sections, press or pull them gently to release. Separating the frame sections allows you to store the crate flat. It also helps when packing the crate into tight spaces.

Credit: www.msn.com
Store Parts Safely
After disassembling your dog crate, storing the parts safely is crucial. It prevents loss, damage, and makes reassembly easier. Taking a few extra minutes to organize and protect each piece can save you frustration later.
Organize Screws And Small Pieces
Small parts like screws, bolts, and washers can easily get lost. Use a clear container or a small zip-lock bag to keep them together. Label the container with the crate model or part description for quick reference.
If you have several types of screws, separate them using small compartments or divided boxes. This keeps everything neat and speeds up your next assembly. Have you ever spent hours searching for a single missing screw? Keeping them organized prevents that hassle.
Wrap Panels For Protection
Metal or plastic panels can scratch or dent if left unprotected. Wrap each panel in bubble wrap, old towels, or foam sheets to cushion them. This simple step prevents damage during storage or transport.
Stack wrapped panels vertically rather than horizontally to avoid pressure marks. Store them in a dry place to prevent rust or mold. Protecting the panels ensures your crate stays in good condition and ready for use.
Tips For Reassembly
Reassembling your dog crate can be much smoother if you prepare during the disassembly process. Paying attention to how you take it apart saves time and frustration later. Here are some practical tips to help you put everything back together without a hitch.
Label Components
Label each part as you disassemble the crate. Use masking tape and a marker to write simple notes like “side panel” or “door hinge.”
This small step helps you identify pieces quickly, especially if some parts look very similar. You won’t waste time guessing where each component fits, which can turn a confusing task into a straightforward one.
Have you ever found yourself staring at a pile of parts wondering, “Where does this go?” Labeling can prevent that moment of doubt and save you from unnecessary stress.
Follow Manufacturer Instructions
Always keep the manufacturer’s instructions handy during reassembly. Even if you think you remember the steps, the guide often includes important details you might overlook.
If you lost the paper instructions, check the brand’s website. Many provide downloadable manuals or video tutorials that show the exact way to put the crate back together.
Ignoring these instructions can lead to unstable assembly, which affects your dog’s safety. Are you sure the crate will hold up if you skip this step?
Frequently Asked Questions
How Do I Safely Disassemble A Dog Crate?
First, remove any bedding and toys. Next, unscrew or unlatch panels gently. Keep all parts organized. Avoid using excessive force to prevent damage. Follow the manufacturer’s instructions if available for safe disassembly.
What Tools Are Needed To Disassemble A Dog Crate?
Typically, you need a screwdriver or an Allen wrench. Some crates may require pliers or a wrench. Check your crate’s assembly manual for specific tools. Having a small container helps keep screws and bolts secure.
Can I Disassemble A Dog Crate Without Damaging It?
Yes, by carefully removing screws and latches. Avoid forcing parts apart. Keep track of all hardware to ensure easy reassembly. Taking photos during disassembly can also help prevent damage and confusion.
How Long Does It Take To Disassemble A Dog Crate?
It usually takes 10 to 20 minutes. Time depends on crate size and design. Being organized and using proper tools speeds up the process. Avoid rushing to prevent mistakes or damage.
Conclusion
Disassembling a dog crate is simple with the right steps. Take your time and follow each instruction carefully. Keep all parts together to avoid losing anything. Use basic tools if needed, and work in a clean space. This helps make the process smooth and fast.
You can now store or move your crate easily. Remember, patience makes the task easier. Enjoy the extra space after removing the crate!

Emily Barker is the founder of ChillDogLife.com, a space dedicated to helping pup parents discover the best dog products, lifestyle tips, and cozy ideas for happier homes.
A lifelong dog lover, Emily combines her passion for pets with a knack for research to share trusted recommendations on everything from toys and furniture to health and everyday care.
Her goal is simple: to make life easier, stylish, and more joyful for dogs and the people who love them.