If you want to train your dog effectively, tasty treats are a must-have. But store-bought snacks can be expensive and filled with ingredients you might not recognize.
What if you could make your own dog treats at home? Imagine having full control over what your furry friend eats, using simple ingredients you trust. You’ll learn easy steps to create delicious, healthy treats that will motivate your dog and strengthen your bond.
Ready to turn training time into a fun and rewarding experience for both you and your pup? Keep reading to find out how!

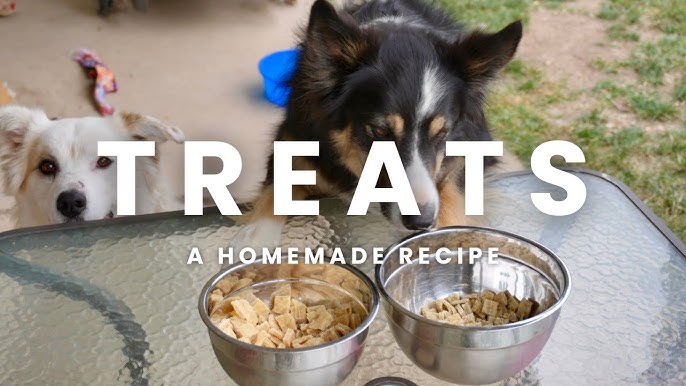
Credit: thewoksoflife.com
Benefits Of Homemade Dog Treats
Making your own dog treats is a great way to keep your pet healthy. You control what goes into each treat.
Homemade treats can help with training by giving your dog tasty rewards that are good for them.
Healthier Ingredients
Store-bought treats often contain fillers and artificial ingredients. Homemade treats use fresh, natural items.
You can choose ingredients that support your dog’s health, like lean meats, vegetables, and whole grains.
- No artificial colors or flavors
- Fewer preservatives
- Fresh and simple ingredients
Customization For Allergies
Some dogs have allergies or food sensitivities. Homemade treats let you avoid those problem ingredients.
You can try different recipes to find what works best for your dog’s needs and tastes.
- Exclude common allergens like wheat or dairy
- Use alternative ingredients like sweet potato or pumpkin
- Test small batches safely
Cost Savings
Buying ingredients in bulk and making treats at home can save money. Store treats can be expensive.
You can make large batches and store them to use over time, reducing frequent purchases.
- Use simple pantry staples
- Make many treats from one recipe
- Save on packaging and shipping costs
Essential Ingredients For Dog Treats
Making dog treats at home lets you control what your dog eats. Using the right ingredients ensures treats are healthy and tasty.
Choose simple, natural ingredients that support your dog's training and health. Avoid harmful additives and fillers.
Protein Sources
Protein helps dogs build strong muscles and stay active. Use lean meats or other animal proteins for the best treats.
Good protein options include cooked chicken, turkey, and beef. You can also use eggs or fish for variety.
- Cooked chicken breast
- Ground turkey
- Boiled eggs
- Canned salmon (no bones)
- Lean beef pieces
Grains And Vegetables
Grains and vegetables add fiber and vitamins to dog treats. They also help with digestion and energy.
Use cooked grains like rice or oats. Fresh vegetables such as carrots and peas are good choices.
- Cooked brown rice
- Oats
- Carrots (grated)
- Peas
- Sweet potatoes (mashed)
Safe Flavorings
Flavorings make treats more appealing to dogs. Use safe herbs and natural ingredients to add taste.
Avoid spices and ingredients harmful to dogs. Stick to dog-friendly options like parsley or a little peanut butter.
- Parsley
- Cinnamon (small amount)
- Peanut butter (xylitol-free)
- Chicken broth (low sodium)
- Plain yogurt
Tools And Equipment Needed
Making dog treats for training needs some simple tools. These tools help you prepare, bake, and store the treats easily.
Using the right equipment saves time and keeps your kitchen clean. Here are the main tools you will need.
Mixing Bowls And Utensils
Mixing bowls are where you combine your ingredients. Choose bowls that are easy to clean and the right size for your batch.
Use utensils like spoons, spatulas, and whisks to mix the dough well. A sturdy spoon helps with thick mixtures.
- Medium and large mixing bowls
- Wooden or silicone spoons
- Rubber spatulas for scraping
- Whisk for dry ingredients
Baking Sheets And Parchment
Baking sheets hold the treats while they bake. Pick sheets with low sides for even baking.
Parchment paper stops treats from sticking to the pan. It also makes clean-up fast and easy.
- Non-stick baking sheets
- Rolls or pre-cut parchment paper
- Optional silicone baking mats
Storage Containers
After baking, keep your dog treats fresh in storage containers. Pick containers that seal tightly to keep air out.
Clear containers help you see how many treats are left. Choose sizes that fit your treat amounts.
- Airtight plastic or glass containers
- Containers with snap-on lids
- Small jars for portion control
Credit: www.amazon.com.au
Simple Recipes For Training Treats
Making dog treats at home is easy and fun. These treats help with training and keep your dog happy.
Use simple ingredients that are healthy and safe for your dog. Here are some easy recipes to try.
Peanut Butter And Oat Bites
Peanut butter and oats make tasty, soft bites dogs love. They are quick to prepare and bake well.
Mix rolled oats, peanut butter, and a little water to form dough. Shape into small balls and bake until firm.
- 1 cup rolled oats
- ½ cup peanut butter (unsweetened, no xylitol)
- 2-3 tablespoons water
Sweet Potato Chews
Sweet potato chews are healthy and chewy. They are great for dogs who like to chew but need soft treats.
Slice sweet potatoes thinly and bake them slowly until dry but flexible. Store in an airtight container.
- 1 large sweet potato
- Sharp knife or mandoline slicer
- Baking sheet and parchment paper
Chicken And Carrot Snacks
Chicken and carrot snacks are high in protein and vitamins. Dogs enjoy the natural flavors and texture.
Cook chicken breast and finely chop it. Mix with grated carrot, form small patties, and bake until firm.
- 1 cooked chicken breast, chopped
- ½ cup grated carrots
- 1 egg (optional, for binding)
Tips For Baking And Storing Treats
Making dog treats for training is fun and rewarding. Baking the treats right helps keep them tasty and safe.
Storing treats properly keeps them fresh longer. This helps your dog enjoy every bite during training.
Baking Time And Temperature
Use the right temperature to bake treats evenly. Too high heat can burn them, too low makes them soft.
Check the recipe for exact baking times. Usually, small treats bake faster than larger ones.
- Preheat oven to 325°F to 350°F (160°C to 175°C)
- Bake small treats for 10-15 minutes
- Check treats often to avoid burning
- Let treats turn golden brown for best texture
Cooling And Cutting
Cool treats completely before cutting. Warm treats can break or crumble.
Use a sharp knife or cookie cutter to cut treats. This keeps edges clean and shapes neat.
- Place treats on a wire rack to cool evenly
- Wait 15-20 minutes before cutting
- Cut treats into small, training-friendly sizes
- Store broken pieces separately for quick snacks
Proper Storage Methods
Store treats in an airtight container to keep them fresh. Avoid moisture and air exposure.
Refrigerate or freeze treats if you make large batches. This extends their shelf life safely.
- Use glass or plastic containers with tight lids
- Keep treats in a cool, dry place away from sunlight
- Label containers with the baking date
- Freeze treats for up to 3 months
- Thaw treats fully before giving to your dog
Credit: www.zukes.com
Incorporating Treats Into Training
Using treats in dog training helps your dog learn faster. Treats motivate dogs to follow commands.
Choosing the right treats and using them properly improves training success. Let’s look at key points.
Choosing The Right Treat Size
Pick small treats that your dog can eat quickly. Large treats may slow down training sessions.
Small pieces keep your dog focused and ready for the next command. Cut treats into bite-sized pieces.
- Use treats about the size of a pea
- Break bigger treats into smaller portions
- Choose soft treats for easy chewing
Timing And Frequency
Give treats immediately after your dog does the right action. This helps your dog connect the treat to the behavior.
Use treats often at first, then slowly reduce them as your dog learns. This keeps your dog interested and motivated.
- Reward within 1 second of the correct action
- Start with treats every time your dog obeys
- Gradually give treats less often over time
Positive Reinforcement Techniques
Use treats to reward good behavior, not to stop bad behavior. This teaches your dog what you want.
Combine treats with praise and petting. This makes your dog feel happy and eager to learn.
- Give treats right after good behavior
- Say “Good job” or use a happy tone
- Pet your dog gently after giving treats
Avoiding Harmful Ingredients
Making dog treats at home is a fun way to train your dog. It is important to avoid ingredients that can harm your pet. Safe treats help your dog learn and stay healthy.
Some foods and additives can cause serious problems for dogs. Knowing what to avoid keeps your dog safe during training. Use only healthy and safe ingredients in your treats.
Toxic Foods For Dogs
Many common foods are toxic to dogs. These foods can cause illness or even death. Avoid these foods completely when making treats.
- Chocolate
- Grapes and raisins
- Onions and garlic
- Avocado
- Xylitol (found in sugar-free gum)
- Alcohol
- Caffeine
Artificial Additives To Skip
Artificial additives can harm your dog’s health. Many treats use colors and preservatives that cause allergies or upset stomachs. Skip these harmful chemicals.
- Artificial colors
- Artificial flavors
- Preservatives like BHA and BHT
- Sweeteners such as xylitol
- Excess salt
Safe Substitutes
Use natural and healthy ingredients instead. These options keep treats tasty and safe for your dog. Fresh ingredients help your dog enjoy training time.
- Plain cooked chicken or turkey
- Carrots and green beans
- Oatmeal and brown rice
- Peanut butter (without xylitol)
- Unsweetened pumpkin puree
Frequently Asked Questions
What Ingredients Are Best For Homemade Dog Treats?
Use simple, dog-safe ingredients like peanut butter, oats, pumpkin, and sweet potatoes. Avoid toxic items like chocolate or onions.
How Can I Make Dog Treats Healthy For Training?
Choose low-calorie, nutrient-rich ingredients to keep treats healthy. Small, bite-sized pieces help maintain your dog’s diet.
How Long Do Homemade Dog Treats Last?
Store treats in an airtight container. They typically last about one to two weeks refrigerated or longer if frozen.
Can I Customize Dog Treats For Allergies?
Yes, substitute common allergens like wheat or dairy with hypoallergenic options such as rice flour or coconut oil.
Conclusion
Making homemade dog treats is simple and rewarding. Your dog gets tasty, healthy snacks. You gain control over ingredients, ensuring safety. Training becomes easier with these treats. Your bond with your dog strengthens. Plus, you save money. Try different recipes to find your dog’s favorite.
Enjoy the process and watch your dog’s excitement grow. Remember, moderation is key for a healthy diet. Make a batch today and see the benefits. Your dog will thank you with wagging tails and happy barks. Happy training and treat making!

Emily Barker is the founder of ChillDogLife.com, a space dedicated to helping pup parents discover the best dog products, lifestyle tips, and cozy ideas for happier homes.
A lifelong dog lover, Emily combines her passion for pets with a knack for research to share trusted recommendations on everything from toys and furniture to health and everyday care.
Her goal is simple: to make life easier, stylish, and more joyful for dogs and the people who love them.